Overview
This is my papercraft model of the Final Fantasy Tactics Windmill map. I didn’t expect to put this one in a blog format, so I’m missing pictures of parts of the process. In the future, I’ll be sure to include some progress pics to go with the instructions.


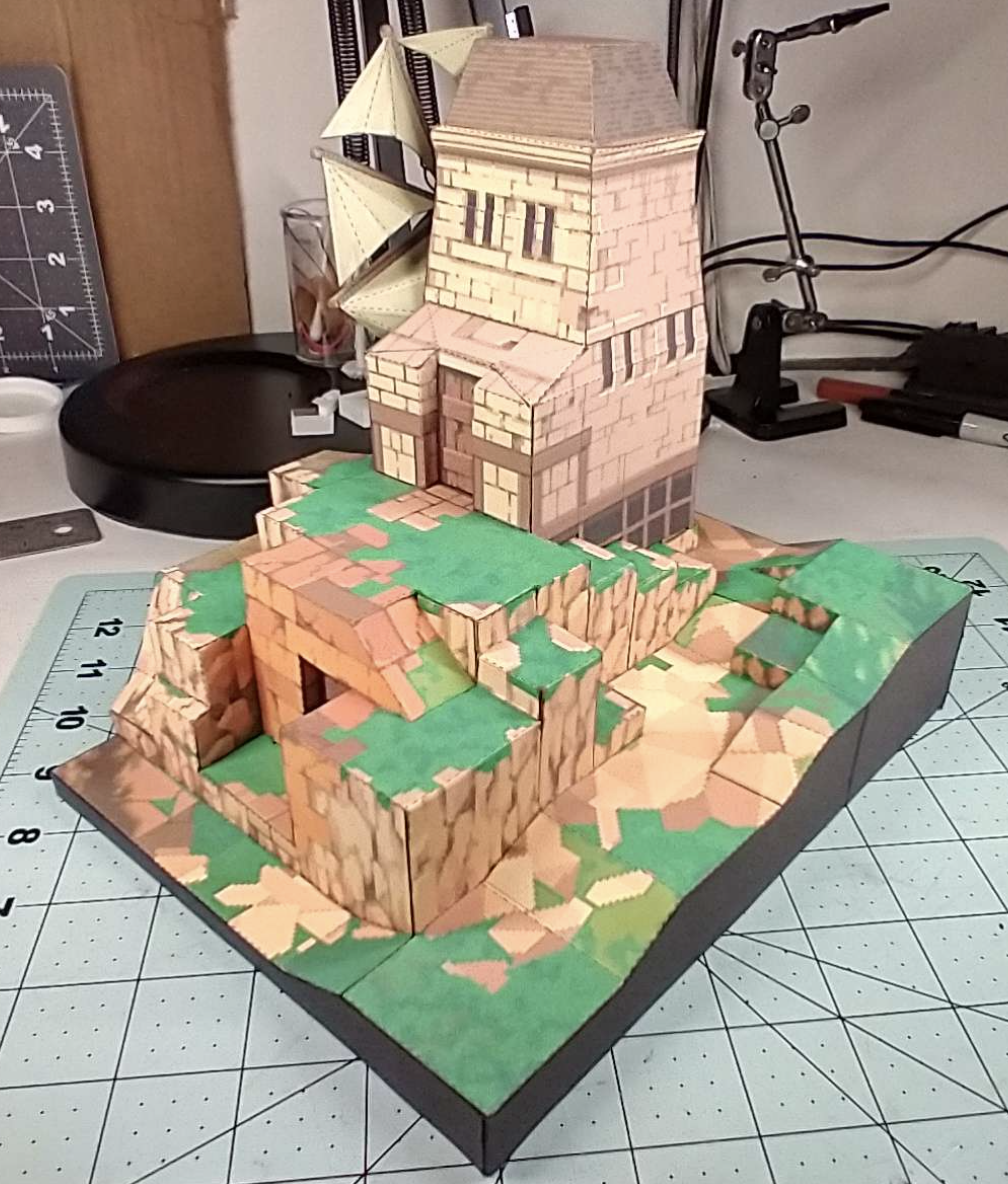


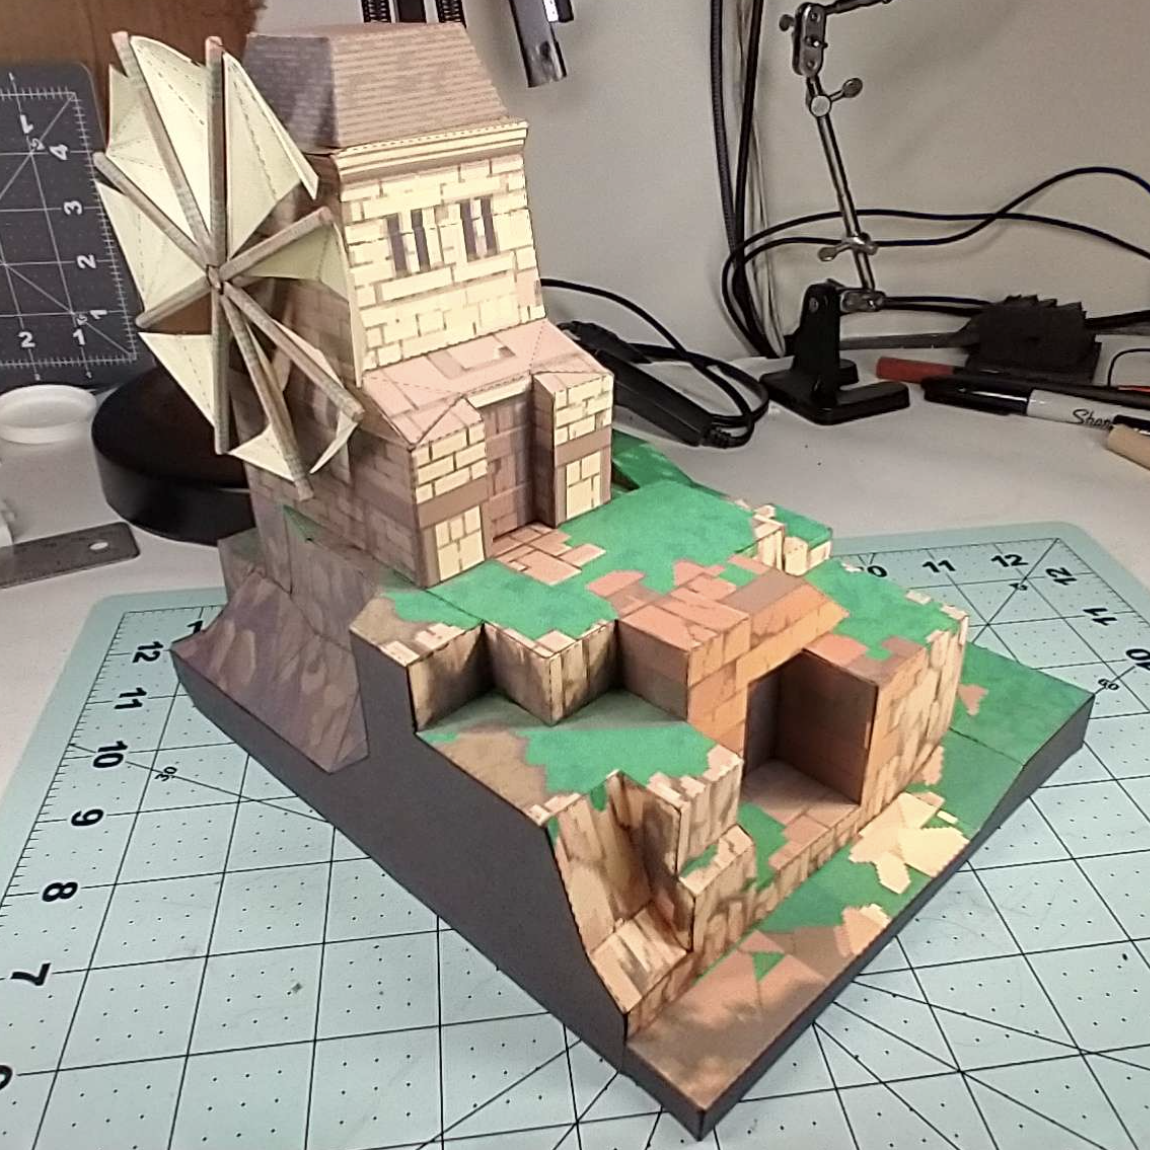
This was my first real experience with designing 3D printed mechanical parts. I would probably do it differently if I had to start over. The gears aren’t smooth enough to my liking and the method to spin it is clunky.
If you attempt this yourself, note that the included files aren’t perfectly usable out of the box. You will need to add tabs or remove tabs to get things to fit. There are also a few unused parts here and there – particularly around the windmill spokes as the 3D model connects to the paper parts.
My process
- I used GaneshaDX to export a .glb 3D model of the map
- I imported the .glb into Blender, scaled it to my desired size (2cm/square), and cleaned up the mesh in various parts to help with the next step
- I exported from Blender as .glb and imported the model into PaperMaker and used it to unfold the geometry and adjusted tab placement to where it looked good
- I exported the flat papercraft to PDF and adjusted some color options in my printer to get the print as close as possible to the original map color
- Back in Blender, I used the mesh as a reference to create a to-scale mechanical model of the bevel gear movement mechanics
- I assembled the papercraft excluding the top of the tower so that the mechanics could be fit into place attaching it to a foamcore base that had a hole in the bottom to put a hand through to reach the long axle.
- Once the mechanics were in place, I finished the top of the tower
Tips
- Use the included height blocks to help keep things square and solid. You don’t need them everywhere, but they come in handy.
- The windmill sails are meant to be folded over. They should be folded along the mirrored line (it is not marked by a dotted or solid line).
- Use permanent markers to color the edge of the paper and any white parts that show through. This helps the model maintain visual cohesiveness.
Breakdown
- Time to make: 10-20 hours
- Scale: 2cm / square
- Materials I Used:
- Cardstock Paper
- Tacky Glue
- Black foamcore board (4.9mm thick) for the base and outside perimeter
- Envelope Folder to help with precise folds
- 3D Printer – I have a Ender 3 V2 Neo and used PLA filament
- Scissors
- Razor Blade
- Ruler
- Permanent Markers (Green, Brown, Black)
Files
- Papercraft: PDF Download
- Sails: PDF Download
- 3D Modelling Files: Archive Download
Leave a Reply